Categories
New York

Simple Weight Exercises Using the iJoy Board

Human Touch iJoy Exercise Board - Blue/ Black
Human Touch iJoy Exercise Board – Blue/ Black

I haven’t made much use of my iJoy Board in a long while.  You maintain your balance on the board while it moves at various speeds.  This is the only device where you have to react to what is happening with no forewarning.

I decided to dust off my iJoy board and do bicep curls, modified triceps kickbacks and lateral raises while the board was going full speed.  It probably wasn’t a wise or safe thing to do but it was a lot of fun. 🙂

So far, my body fat percentage has decreased 1.5% although my weight is down only 8 pounds.  I guess that’s a good sign.

Categories
New York

Improving Your Kicking Technique

I’m trying to find the exercises my trainer had me do to practice proper kicking technique.  I found the following instructions on various sites.

The key to the exercise is to break the kick down into its component parts and to practice it slowly.

  1. First raise your knee, hold it
  2. extend the leg, hold it,
  3. lower the leg but keep your knee up, hold it,
  4. lower your leg back to where you started.

These positions should all be held for several seconds each (holding them longer can help build tendon strength). You can practice all your kicks using this method.

The Sanda Sidekick:

Breaking the kick down into its component parts helps you master the mechanics of it, and helps to prevent sloppy technique.  It makes the difference between what is little more than a quick sideways leg raise instead of a good high sidekick. 

Focus just beyond the edge of your foot (which should be through the other side of the target). While focus is paramount, you’ll need to strengthen tight/weak muscles. If you cannot kick at a height that satisfies you, then back off a little and perfect your kick at a lower level, then gradually work your way up in height.

Here’s a step by step description of the Sanda sidekick (all of it is excellently illustrated in the video that follows):

Before throwing the kick:  Stand in your proper fighting stance with your target in front of you.

  • Step One
    • Lift your lead leg upwards, slightly past center-line as if you are checking a low kick coming from the opposite side.
    • Do not turn your body sideways as you initially lift your leg. This is unnecessary movement and will telegraph the kick.
    • Bend your ankle so that you can land the strike with your heel – not the sole or the blade of the foot.
    • To get extra range on your sidekick, shuffle your planted foot forward as you throw the kick. Make sure the planted foot drives down when the kick lands.
      To get extra range on your sidekick, shuffle your planted foot forward as you throw the kick. Make sure the planted foot drives down when the kick lands.
  • Step Two
    • Chamber your kicking leg higher so that your shin is parallel to the ground.
    • Simultaneously turn your body sideways.
    • Turn the foot of your supporting leg so that your heel is pointing towards your opponent.
  • Step Three
    • Kick straight out, thrusting with the power of your hips as well as with both your legs.
    • As the kick lands, push into the ground with the ball of your panted foot. This will drive the force of your kick from the target into the ground.
    • Your leg muscles should only be tensed when your kick is fully extended.
    • The heel of your planted foot should be pointing in the same direction of the kick.
    • Don’t lean your body weight away from the target. You want your entire momentum to be driven forward into your opponent.
    • To add extra distance and power, shuffle your supporting foot towards the target as the kick is being delivered. Do this by propelling your entire body weight forward with the momentum of your kick. Land your shuffling foot at the same time the kick hits the target.
  • Step Four
    • Re-chamber your leg towards your chest. Your shin should be parallel to the ground as it is being retracted.
    • Don’t drop your leg directly to the ground after kicking. Always re-chamber your leg as you will be vulnerable to counter-striking and kick catch techniques. This is especially important in MMA, since it will be easy for your opponent to catch your kick and take you down.
    • It’s also important to keep your heel pointed at the target as you retract your kick so that you are in position to fire another quick kick in case your opponent tries to close the distance for a take-down.
  • Step Five
    • Place your kicking leg back on the ground as you square up to your fighting stance and re-establish your guard.

Watch this video!  Jason Yee, the instructor, is terrific.

(Jason Yee demonstrates techniques for the Sanda Sidekick as well as a few exercises to build strength in order to perform the maneuver.) The Sanda Sidekick – KungFuMagazine.com


Categories
New York

Really Helpful Video on How to Do a Sidekick Correctly

I found this link while trolling for videos that would help me improve my sidekick.  It’s been a long time since I’ve practiced.  This video has a tip that teaches you how to ensure your sidekick travels in a straight line.  The guy in the video seems a little nerdy but his review of proper form and suggestions to improve your sidekick are terrific.  Enjoy!

Categories
New York

Goal Setting

I’ve read all sorts of articles saying that the most sensible way to lose weight is to lose 1-2 pounds per week.  This translates into making only minor adjustments to how and what you eat.  That’s important because just the thought of “dieting” makes me hungry and depressed. The second part of the advice is to maintain or increase weight/resistance training so that you don’t lose muscle while you’re losing weight; you should try to reduce body fat only.

My idea is to cut down on calories but not so much that my body thinks it is starving and I end up as a yo-yo dieter.  Over the past few weeks, we’ve been eating more fruits and vegetables and reducing the number of snacks.  We’ve also been hiking, playing tennis and swimming.  My husband’s lost over 20 pounds!  I haven’t done as well although I am ahead of my 1 pound a week goal.  Happily, I am also down one dress size.

Under the Tools and Calculator tab, is a section called How much should you weigh?   The link brings you to the Fat2FitRadio.com  site.  They have a goal body weight calculator  that uses your body fat percentage and your lean body mass to gauge how much you should weigh.

The Fat2FitRadio.com site has a Calories and Basal Metabolic Rate (BMR) Calculator.  This calculator establishes the baseline number of calories you should eat on a daily basis AND the number of calories that you should start eating today and for the rest of your life  (http://www.fat2fitradio.com/tools/bmr/).  It is astonishing how many much calories they suggest you eat versus almost everyone else (including Sparkpeople.com).

BMR is the minimum number of calories your body needs to consume so that it works correctly; you also need calories/energy so that your body can perform basic activities.

Here are some basic weight exercises you can do while watching TV:

  •  Biceps –  alternating bicep curl. A bicep curl is the standard bicep workout done with hand weights. Doing an alternated curl means you switch back and forth between your arms so that you get an even workout.
    • Stand with your feet apart and flat on the ground. Hold a dumbbell in each hand and let each hand hang down at your side with your palms facing in towards each other.
    • Raise your right dumbbell so that it reaches shoulder height by curling your forearm up towards your chest. The underside of your forearm should face up towards the sky.
    • While lowering the right dumbbell, begin to lift the left one up in the same manner. Avoid jerking your body backwards to help you lift the dumbbells. If you are doing this, your dumbbells are too heavy.
  • Biceps –  hammer grab.
    • Grab a dumbbell in each of your hands so that your palms face in towards your body. Hold your arms down by your sides.
    • Curl your arms and lift the dumbbells so that the tops of the dumbbells comes toward your shoulders. The inner side of your forearm should be facing side.
  • Triceps – two-arm tricep extension. This workout only uses one dumbbell. You can do this while standing or sitting.
    • Grasp one dumbbell with both of your hands and hold it behind your head. Your arms should be bent into right angles with your forearms running along the sides of your head so that the dumbbell is in the back of your head.
    • Extend your elbows and lift your forearms so that they are pointed vertically above your head with the dumbbell. Hold that position for a moment and then lower them back to the right angle position behind your head.
  • Triceps – triceps kickback.  Place your left knee and left hand on to the flat surface of either the bed or bench. Your right leg should be straight against the side of the bed or bench.
    • Hold a dumbbell with your right hand. Your upper arm should be running parallel to your body and your palm should be facing your body.
    • Extend your elbow so that the dumbbell lifts up towards your back. Hold the dumbbell up for a moment and then release it back down.
    • Switch so that your right knee and right hand are on the bed and extend your left tricep.
  • Shoulders – palms-in shoulder press.
    • Stand up, holding dumbbells in both hands. Hold the dumbbells at shoulder level. Your palms should be facing each other.
    • Extend your elbows until the come close to locking. The dumbbells should get raised straight into the air–hold them in this position for a moment.
    • Slowly lower your arms so that the dumbbells are back at shoulder level.
  • Shoulders – lateral raise. You can also do these while sitting but instead of holding the dumbbells in front of you, hold them down by your sides.
    • Hold a dumbbell in each hand and hold your hands in front of your hips. Your palms should be facing each other.
    • Lift your arms out to your sides until they are almost parallel with the ground. Hold them in this position for a moment and then release them back down to your hips.
  • Back – wide row exercise.  For this exercise, keep in mind that you should breathe out when lifting the dumbbells up, and breathe in when releasing them back into resting position.
    • Get into a squatting position by flexing your hips and knees. Hold one dumbbell in each hand so that your palms are facing your body. The dumbbells should start just below your knees.
    • Lift the dumbbells straight up so that your arms form right angles. You should not alter how your knees and hips are bent.
    • Hold the dumbbells up for a moment and then let them slowly drop back down into resting position.


Categories
New York

Fighting a Fatty Liver

A couple of years ago my doctor asked me how much alcohol I was drinking because my blood test came back with abnormal results.  I don’t drink very much or very often so i was surprised by the question.  It turns out that the most common disease in America is called NALFD (non-alcoholic fatty liver disease) or fatty liver, for short, and is a major risk factor for diabetes, heart attacks, and even cancer. It can progress to Non Alcoholic Steatohepatis (NASH), which causes liver inflammation and can lead to cirrhosis or liver cancer in about 10% of those affected.

Fat and the liver: Though the exact effect of excess fat on the liver isn’t well understood, it appears to create problems on a spectrum. At the low and least harmful end, the liver may be able to perform its many functions even while it contains too much fat. However, once inflammation and swelling occur in the organ, scarring can result as the liver tries to heal itself. This is a hallmark symptom of liver injury in advanced non-alcoholic fatty liver disease: collagen is laid down, and fibrosis or thickening of the liver tissue ensues. As the disease progresses, about 10% of cases will develop over the next ten years into the much more serious NASH, or non-alcoholic steatohepatitis. NASH can lead to cirrhosis or hardening of the liver, liver failure, liver cancer, and death.

What causes it?  The high fructose corn syrup found in our processed foods is the single biggest cause of fatty liver. Soda, which, frighteningly, is the number one source of calories in the American diet, is the biggest cause of fatty liver.

Who gets non-alcoholic fatty liver disease? Though the exact causes of NAFLD are not known, most of the people who develop it are obese, have type 2 diabetes or have metabolic syndrome, which is associated with insulin resistance. What’s more, the severity of NAFLD increases with the degree of obesity, and abdominal or belly fat seems to increase the risk of dangerous NASH, even in patients with a body mass index (BMI) in a normal range.

Genetic factors influence each individual component of the syndrome, and the syndrome itself. A family history that includes type 2 diabetes, hypertension, and early heart disease greatly increases the chance that an individual will develop the metabolic syndrome.

Environmental issues such as low activity level, sedentary lifestyle, and progressive weight gain also contribute significantly to the risk of developing the metabolic syndrome.

Metabolic syndrome is present in about 5% of people with normal body weight, 22% of those who are overweight and 60% of those considered obese. Adults who continue to gain five or more pounds per year raise their risk of developing metabolic syndrome by up to 45%.

While obesity itself is likely the greatest risk factor, others factors of concern include:

  • Women who are post-menopausal
  • Smoking
  • Eating an excessively high carbohydrate diet
  • Lack of activity (even without weight change)

How do you know if you have it?

There are blood tests available that can detect a fatty liver. You can also see it on an ultrasound. And if your test comes back abnormal, you are in trouble. But even if your test comes back normal, you might not be out of the woods. It’s important to know that a liver function test doesn’t always detect a fatty liver. An ultrasound can be more sensitive.

The bottom line is, if you eat a lot of sugar and flour, if you have a little bit of belly fat, or if you crave carbs, starch, and sugar, you probably have this.

How to fix your fatty liver

The most promising treatments for NAFLD are weight loss (including bariatric surgery) and exercise. There are some really simple things you can do:

  • Cut out all high fructose corn syrup from your diet. If you see it on any label for any product—whether it’s a salad dressing or ketchup or tomato sauce—don’t eat it.
  • Reduce or eliminate starch. Get rid of white, processed flour. Even whole grain flours can be a problem.
  • Add some good things to your diet to help heal your fatty liver. Add plenty of fruit, vegetables, nuts, and seeds. Add lean animal protein like chicken and fish. Add good oils like olive oil, macadamia nut oil, avocados, coconut butter, and fish oil. Good fats like these are anti-inflammatory, and they help repair your liver.
  • Improve your metabolism through exercise. This is a fabulous way to improve insulin resistance and reduce fatty liver.
  • Supplements:  Polyunsaturated Fatty Acids (PUFA’s), can be helpful. Omega 3 fish oils have been shown to reduce fatty infiltration on ultrasound, and they’re also anti-inflammatory and reduce insulin resistance. A recent study used Cinnamon (1500mg) to treat NALFD and found that liver enzymes improved (as well as blood sugar, lipids and inflammation markers).

More information:

On a lighter note (pun intended) I really like doing the online Body Age quizzes. A thorough one (which incidentally gave me a happy analysis) can be found at: http://www.biological-age.com.

Categories
Calories Diet Fitness

Is Canned Tuna Good For You?

Looking at the problem with Ramen, I was worried that canned tuna fish – my next favorite for a quick and easy meal – may not be healthy for me either.  Happily, it looks like tuna fish is still good for you.  One article on Healthy Eating SFGate listed all sorts of happy news:

  • Omega-3 Fatty Acids: The small amount of fat present in canned light tuna is mostly the healthy unsaturated kind, including omega-3 fatty acids. Omega-3 fatty acids support a healthy brain and promote proper growth and development. These essential fatty acids reduce inflammation in your body, which can reduce your risk of heart disease, cancer and arthritis.
  • Niacin: A 3-ounce serving of canned light tuna contains 11.3 milligrams of niacin toward the 14 milligrams women need each day and the 16 milligrams that men need. Niacin is a B-vitamin that helps keep your digestive system, skin and nerves healthy.
  • Vitamin B12: You need 2.4 micrograms of vitamin B12 each day, and a 3-ounce serving of canned light tuna supplies 2.5 micrograms. Vitamin B12 supports the normal function of your brain and also aids in the formation of red blood cells.
  • Mercury: You can safely eat a serving of canned light tuna every three or four days and a serving of canned albacore tuna every nine-to-14 days, according to the Natural Resources Defense Council.

There’s only 179 calories in a can of tuna fish so it sounds like I may be eating a lot more of it at lunch.

Just as a side note, there was a recall of Bumble Bee and Chicken of the Sea cannd tuna fish in 2013.  “There have been no consumer reports of illnesses attributed to these products,” Steve Mavity, Bumble Bee’s senior vice president of technical services and corporate quality assurance, said in a statement. “But because we’ve identified an issue with seal tightness, we’re voluntarily recalling products to ensure the highest margin of safety and quality.” Loose seals and seams can lead to bacterial contamination, which can cause food poisoning, according to the FDA.

Chicken of the Sea and Bumble Bee, two of the major tuna brands that you’re likely to see on the shelf at your local grocery store, will combine into one as the owner of Chicken of the Sea.  The merger, if approved, would probably happen in the second half of 2015.

Greenpeace has posted notes that Bumble Bee and companies like it, continue to rely on fishing practices that kill millions of marine animals every year, including sharks, turtles, rays and juvenile fish of all kinds. These practices threaten the very ecosystems that will keep our oceans healthy for generations to come.

Categories
Diet Home

How Bad is Ramen Anyway?

marruchan ramenI love Maruchan Ramen noodles. Unabashedly.  I ate them a lot in high school and I still order them in large batches from Amazon.com.  They are fast and filling and warm during the winter months. I figured I was making Ramen more healthy by adding peas and/or carrots and, occasionally, chicken. Ingredients: Ramen Noodle: Enriched Wheat Flour (Wheat Flour, Niacin, Reduced Iron, Thiamine Mononitrate, Riboflavin, Folic Acid), Vegetable Oil (Contains One Or More of The Following: Canola, Cottonseed, Palm) Preserved By Tbhq, Salt, Soy Sauce (Water, Wheat, Soybeans, Salt), Potassium Carbonate, Sodium (Mono, Hexameta, and/Or Tripoly) Phosphate, Sodium Carbonate, Turmeric. Soup Base: Salt, Monosodium Glutamate “MSG”, Sugar, Hydrolyzed Corn, Wheat and Soy Protein

More recently, I thought I was really getting ahead of the cnonggshim noodle
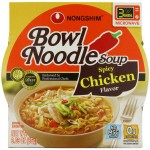
urve by purchasing Nongshim Spicy Chicken Noodle Bowls.  The label says there is no MSG added, and 0 g trans fat (although the Maruchan Ramen does not contain trans fat either.)  The Nonghim Noodles have an endorsement by Professional Chefs (a 2011 Chef’s Best Award)  and there’s 30% less sodium than their regular product.  They come in their individual bowls (yes, each bowl is 2 servings, go figure.) Ingredients: Wheat flour, palm oil, potato starch, modified potato starch, salt,contains less than 2% of each of the following: artificial flavor, beef extract*, beef fat*, beef stock*, black pepper*, calcium phosphate, chicken broth*, corn syrup*, dextrose, disodium guanylate, disodium inosinate, disodium succinate,dehydrated vegetables (carrot, green onion), garlic*, ginger*, gum arabic, hydrolyzed soy protein, lecithin (soy), malic acid, maltodextrin, modified corn starch, mushroom extract*, natural flavors, onion*, potassium carbonate, red chili pepper*, riboflavin (color), rice*, sand lance concentrate*, seaweed extract*, sodium carbonate, sodium phosphates, soybeans*, spices, sugar, tapioca starch, textured soy protein (soy flour, partially hydrogenated soybean oil, salt, yeast extract), tocopherols (antioxidant), yeast extract, yellow corn flour. *powdered contains wheat, soy, and sand lance. Manufactured in a facility that also processes crustacean shellfish and milk.

Here’s the bad news.  Apparently, Ramen isn’t bad for you just because of the sodium. There are a number of articles that noting just how bad Ramen noodles are and how they will kill you. What can you do if you still want Ramen?  Most recommendations to make Ramen healthier is to add vegetables, as I have done.  One site recommends that once your noodles are a little over halfway cooked, (still al-dente) dump the cooking water out and drain the noodles. Put another 2 cups of water on the stove.  (Hey you just discarded a lot of gross starch and a fair amount of fat!).

If you want to read more, here is a good article:

The Street.com – Ramen Noodles May Lead to Chronic Illness: The article uses data from WebMD and, most importantly, findings from a new study by Baylor University. The study was published in The Journal of Nutrition and shows that consumption of instant noodles significantly ups the risk of a scary condition for certain groups of people.

  • Cardiometabolic Syndrome – Cardiometabolic syndrome is a scary condition ; a Baylor study found that eating instant noodles two or more times a week was associated with the syndrome, which raises a person’s likelihood of developing heart disease and other conditions, such as diabetes and stroke.  Ladies, pay attention to this: Women (specifically South Korean), not men, who ate instant noodles at least twice a week showed a 68% higher risk of metabolic syndrome.
  • Noodles: In order to create a long keeping noodle that can be on store shelves or in your kitchen cupboard for 4 to 12 months, it’s deep fried in oil. That’s right, they are fried noodles.
  • BPA Chemicals: Bisphenol A (BPA), is used for packaging the noodles in polystyrene foam containers. Studies have shown that BPA can affect the way hormones send messages throughout our body, specifically the primary female sex hormone, estrogen.
  • Salt: Ramen is high in sodium, packed with 41% of your daily allowance with each package. Most of this sodium is in the flavoring packet. Using less flavoring, which is mostly salt, will reduce the sodium content. Also remember that eating too much sodium can increase a person’s risk of heart failure, osteoporosis, stroke, high blood pressure and heart disease.
  • Flavoring Packet: The flavoring powder is made of salt, monosodium glutamate, seasoning, and sugar. The worst ingredient is the MSG, or monosodium glutamate. That’s the “flavor enhancer” used to improve all kinds of tastes. Instant noodle makers use it to make their shrimp flavors taste more like shrimp, and beef flavors more like beef.
  • Fat: One 85 gram package of ramen noodles has 14.5 grams of fat. The unhealthy saturated fats make up 6.5 grams, which is about one third of your daily allowance. The remainder of the fats are polyunsaturated and monounsaturated fats.

Another issue is that Ramen noodles contain Tertiary-butyl hydroquinone (TBHQ), which is a byproduct of the petroleum industry and food additive frequently to preserve cheap processed foods. In processed foods, it’s sprayed on the food or on its packaging to prevent discoloration and changes to flavor and odor. Others products, such as cosmetics, perfumes, varnishes and lacquers, contain TBHQ to maintain stability.

Small amounts of TBHQ may not kill you (although death has occurred) or even make you feel immediately sick, but it can have a long term effect on your health such as weakening of organs and contributing to the onset of cancers and tumors.